
Placing images on the map
Decorative images such as compasses, ships, and crests can be placed freely on the map. Placed images are part of the map background and are drawn beneath regions and markers.
-
Enter Background edit mode with the Background edit tab at the top left.
-
Select the Image tool. The right panel splits into Insert on top and Hierarchy below.
-
Double-click a tile in Insert or drag it onto the map to place the image.
-
Placed images can be moved, resized, rotated, and adjusted for opacity and tint, and several can be selected at once.
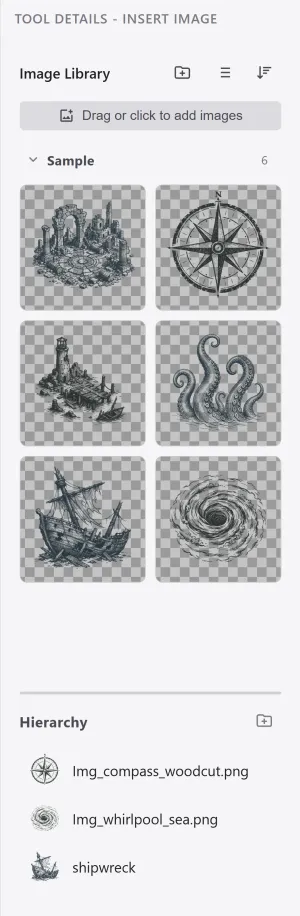
The Hierarchy below lists the placed images. Click an item to select it on the map, drag to change the stacking order, and organize items into folders or delete them.
Size and proportions
Section titled “Size and proportions”With a single image selected, handles appear at the middle of each edge as well as at the corners.
| Handle | What it does |
|---|---|
| Corner | Resizes, keeping the aspect ratio. |
| Edge middle | Stretches along one axis, changing the proportions. |
| Top center | Rotates the image. |
Edge handles follow the image’s own axes, so they still work as expected on a rotated image. They do not appear for a multiple selection, where the images can point in different directions.
Lock and behind stamps
Section titled “Lock and behind stamps”The style panel that opens when you select an image carries two options.
| Option | What it does |
|---|---|
| Lock image | Fixes its position and size, so it cannot be dragged or deleted by accident. Clicking to select it and changing its opacity and tint still work. |
| Behind stamps | Draws the image below the stamps, so the whole shape of a tree or a mountain covers it and the image reads as passing behind the forest. It also follows the terrain’s visibility and opacity. |
For a large picture laid down as a base, turning both on is usually what you want: the lock fixes the placement, and behind stamps makes it look like part of the terrain.
The Insert list is the global, cross-project image library. Add new images to the library first.
A placed image’s data is stored inside the project. The library file is the source, but once placed the image no longer depends on it.