
Export as website
Export as website turns the map that is open now, and its documents, into website files. Once these files are on the internet, anyone can move around the map and read the documents in a browser. On the website the map and documents can only be viewed, not changed.
The website files are saved in a folder on your computer. They are not sent anywhere until you upload them yourself.
Export
Section titled “Export”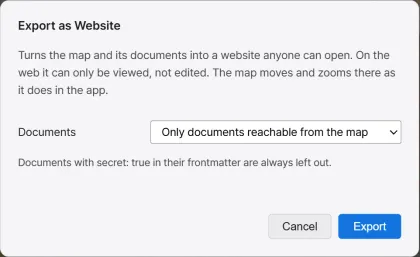
-
In the Map Hierarchy header of the right panel, press the Export as website button next to the Export map image button. A dialog appears.
-
Under Documents, choose which documents go into the website.
-
Press Export and choose a folder to save in. A folder named
<project folder name> webis created inside it, and the website files are saved there. -
When it is done, the dialog shows the number of files and their total size, how many documents went in, and how many secret documents were left out. If documents or images were left out for their format, their numbers are shown too. Press Open folder to open the website folder.
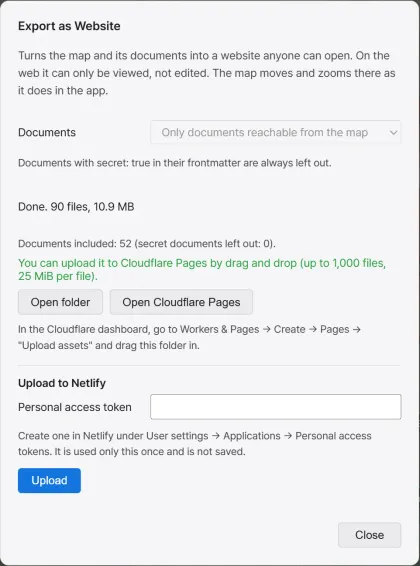
Press Cancel during the export to stop it.
If the folder you chose already holds a folder of the same name from an earlier export, the earlier website files in it are moved to the trash and the new files are saved in the same folder. If a folder of the same name holds other files, a new folder is created with a number added to the end of its name.
The website’s title is the name of the project folder. The text on the website follows the app’s language at the time of export. Its colors follow the Light or Dark theme the app had at that time.
Choose documents
Section titled “Choose documents”The Documents item sets which documents go into the website.
| Element | What it does |
|---|---|
| Only documents reachable from the map | Includes the documents linked to regions and markers that are not hidden, and the documents reached from those by following links. This is the default. |
| All documents | Includes every document in the project. |
Only documents with the .md or .markdown extension go into the website. Whichever you choose, documents with secret: true or 비밀: true in their frontmatter are left out. The frontmatter is the set of items written between two --- lines at the very top of a document.
---secret: true---If the value of the secret or 비밀 item is anything other than false, no, off, 0, 아니오, or 아니요, the document is a secret document.
What the website leaves out
Section titled “What the website leaves out”The following content does not go into the website.
| Item | What it is |
|---|---|
| Secret documents | Documents marked with secret or 비밀 in their frontmatter. |
| Hidden regions and markers | Regions and markers hidden in the map hierarchy, so that they don’t show on the map. |
| Links to documents that were not exported | A region’s or marker’s document link stays only if that document was exported. A link inside a document keeps only its text. |
| Names not shown on the map | The names of placed images, image groups, and roads. |
| External images in documents | A link to the image goes in instead of the image. |
| SVG images in documents | Only PNG, JPEG, GIF, WebP, BMP, and AVIF images in documents go in. |
The information lock does not apply to the website. Names and documents not revealed to participants go in as well, following the rules above. In a project with the information lock turned on, the dialog shows a note saying so.
The website’s map
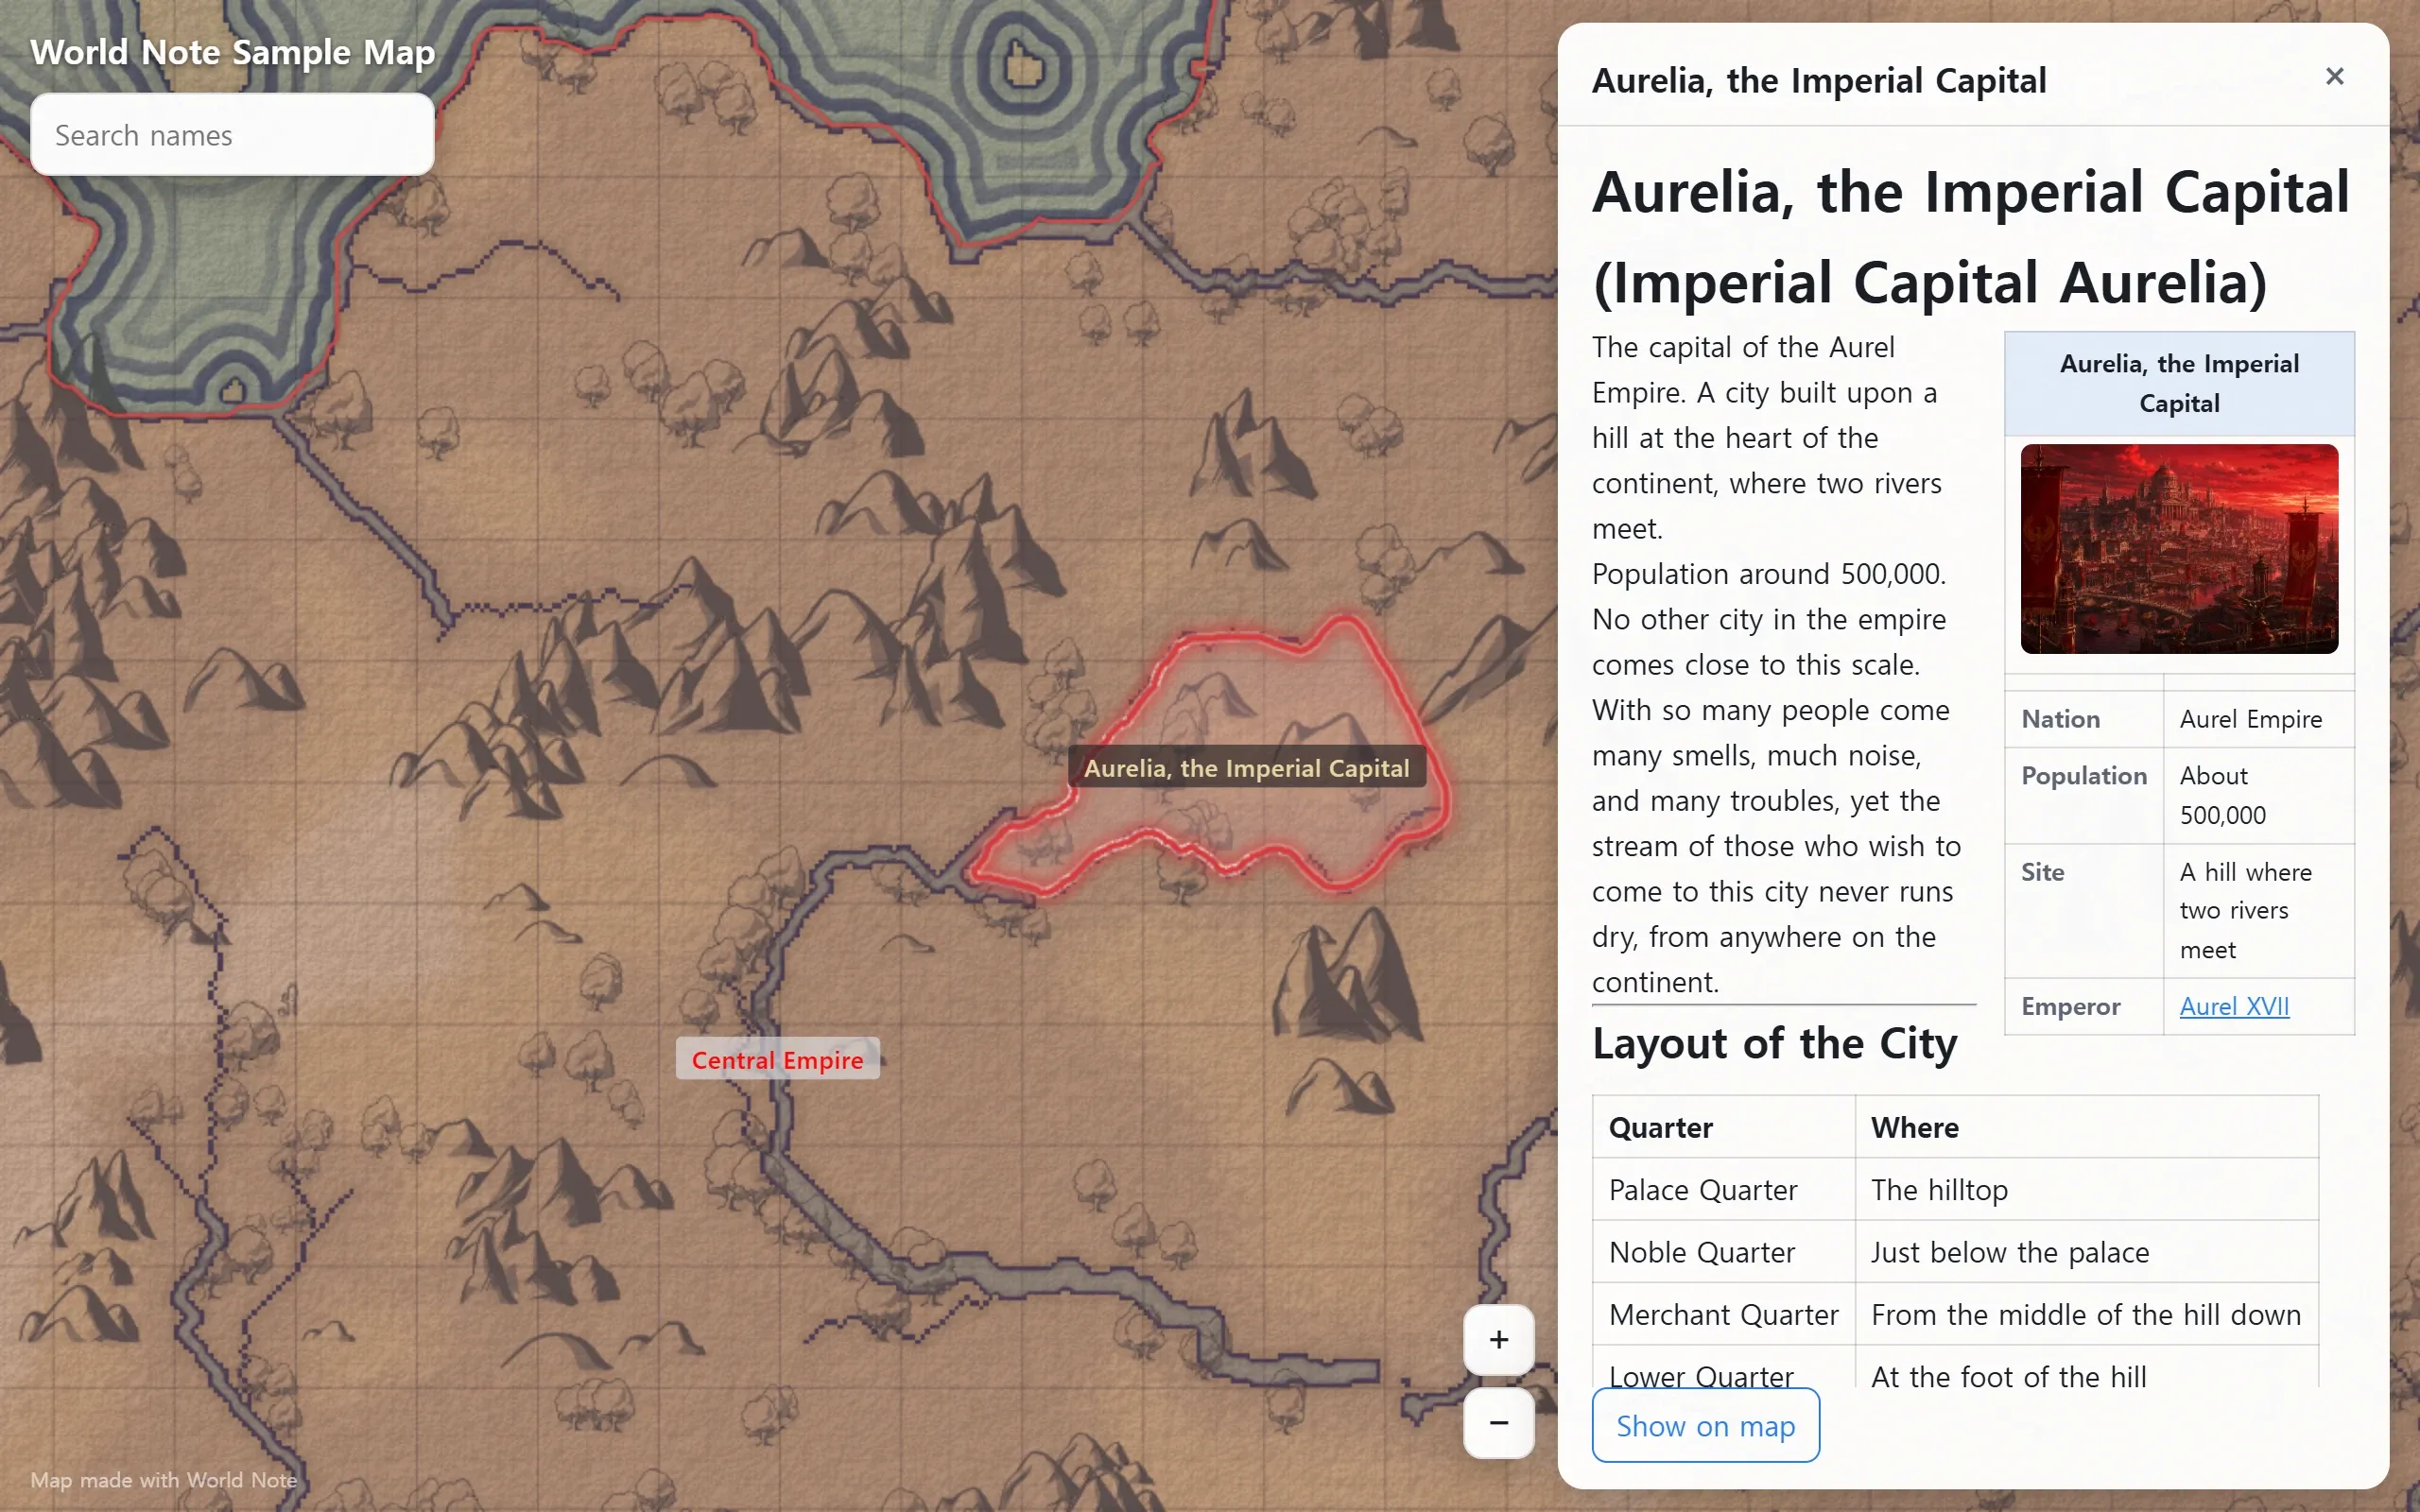
Section titled “The website’s map”The website’s map is drawn the same way as in the app. Zoom in and the detail for that zoom level is drawn, as in the app. Names show in the fonts of the visitor’s computer.
| Element | What it does |
|---|---|
| Move | Drag the map. |
| Zoom in and out | Use the wheel, a double-click, the on-screen + and − buttons, or the + and - keys. |
| Regions and markers | Click one to select it and open its linked document in the document panel. Without a document, only the name shows. |
| Show on map | A button in the document panel. Moves the view to the region or marker the document is linked to. |
| Links in documents | Click a link to another exported document to open that document in the document panel. |
| Search names | Finds the names of regions and markers, and the titles of documents not linked to any region or marker. |
When you open a document, the page address shows that document. Arriving at that address starts the page with the document open. Exporting again keeps the same document at the same address. Renaming a document or moving it to another folder changes its address.
The text Map made with World Note shows at the bottom left of the screen.
Upload to Cloudflare Pages
Section titled “Upload to Cloudflare Pages”To upload to Cloudflare Pages, drag the website folder into the browser. A drag-and-drop upload takes up to 1,000 files, and up to 25MiB per file.
-
Press the Open Cloudflare Pages button in the export result. The website folder opens, and the Pages creation screen of the Cloudflare dashboard opens in the browser.
-
In the dashboard, choose Upload assets and drag the website folder in to upload the website.
If the exported website goes over a limit, the result shows which limit it went over instead of the Open Cloudflare Pages button.
Upload to Netlify
Section titled “Upload to Netlify”Upload to Netlify uploads the website to Netlify straight from the app. It needs a personal access token made in your Netlify account.
-
In Netlify’s User settings, open Applications and create a token under Personal access tokens.
-
Paste the token into the Personal access token field below the export result and press Upload. The app uploads the website to Netlify.
-
When the upload is done, the website’s address appears after Uploaded:. Click the address to open the website in the browser.
The token is used only for this one upload and is not saved. The field is emptied after the upload. To upload again, enter the token again.
The first upload creates a new website on Netlify. To replace that website with new content, export again to the same location and upload with a token from the same Netlify account.